-

Adversary Simulation
Our best in class red team can deliver a holistic cyber attack simulation to provide a true evaluation of your organisation’s cyber resilience.
-

Application
SecurityLeverage the team behind the industry-leading Web Application and Mobile Hacker’s Handbook series.
-

Penetration
TestingMDSec’s penetration testing team is trusted by companies from the world’s leading technology firms to global financial institutions.
-

Response
Our certified team work with customers at all stages of the Incident Response lifecycle through our range of proactive and reactive services.
Designing The Adversary Simulation Lab
As some of you will know, we have recently entered into the Red Team training space. Before deciding to create our course now known as “Adversary Simulation and Red Team Tactics”, it was important to us that a number of fundamentals should be met, which meant:
- A course that is as hands on as possible, involving regular labs to be completed alongside theory material.
- A training environment that is separate for each student, allowing everyone to explore without the fear of affecting anyone else.
Now on paper this sounds pretty straight forward, but if you speak to anyone who has spent enough time developing this kind of lab, you’ll quickly find that constructing something that can scale horizontally to the required number of attendees while maintaining it’s “purposeful misconfiguration” comes with a set of… unique challenges.
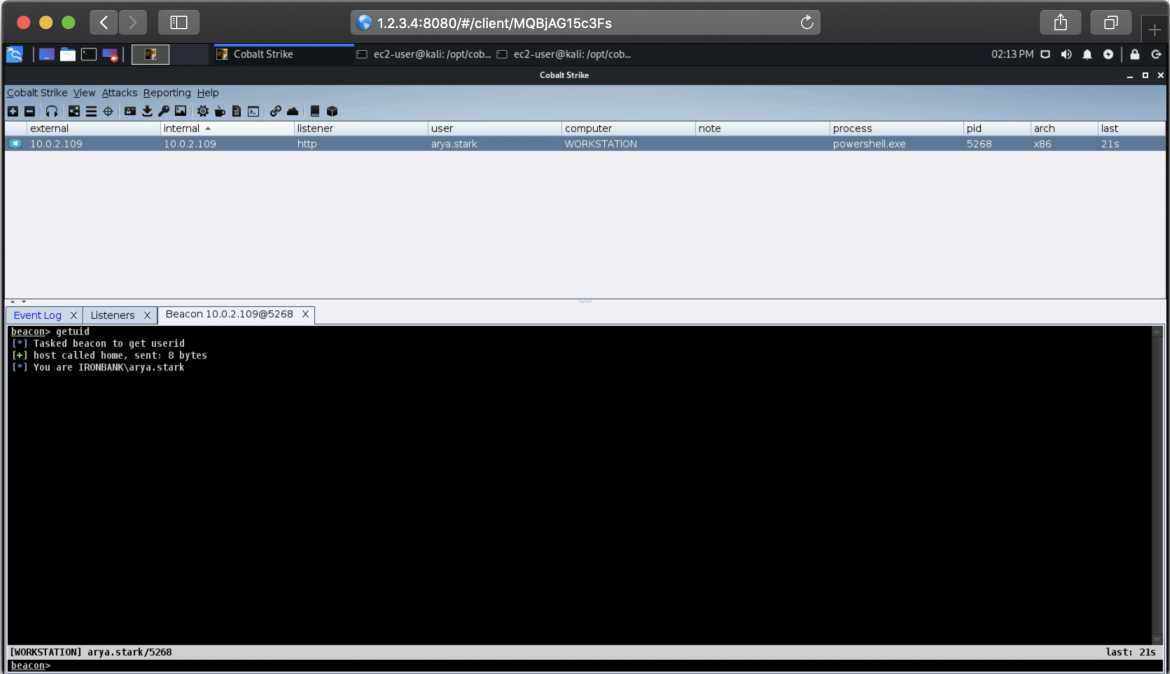
Ultimately however, when everything comes together, using the right tools can result in something really nice:
So in this post we want to walk you through the technology we used to solve these issues, as well as some of the hurdles we jumped through to get things running smoothly. The hope is that for anyone else designing a similar lab in the future, we can help to avoid some of the complications that didn’t become apparent until later in the design stage.
As for anyone who just gets a kick out of watching environments emerge from code, we will also demonstrate some of the concepts by walking through how to create a very simple AWS based lab consisting of 2 domain controllers joined by a bi-directional trust.
Deciding On A Cloud Provider
The first thing to decide on when creating a lab is just what cloud provider you want to target. We already knew that our training environment would consist of a mix of Windows and Linux hosts meaning that our provider of choice would have to support environments outside of just *nix. We also knew that automation was key to all of this, allowing us to use our favourite tools such as Terraform to spin up our infrastructure upon demand.
Initially we had 2 potential candidates, Azure and AWS, both of which came with pros and cons. An initial POC was created using the Azure platform, mostly to take advantage of the support for tools like Desired State Configuration (DSC). After a bit of scaling however it became apparent that AWS offered significant gains in speed when deploying environments, and combined with our familiarity of this platform over the years of building our Red Team infrastructure, the decision was made to use this as our target.
Now using AWS to build a training lab does come with some limitations:
- Initially there are restrictions on the number of instances, security groups, VPCs etc. that can be deployed to any given AWS account.
- While support for Windows provisioning tools is provided, during our initial assessment of AWS they were somewhat limited.
The first limitation is relatively easy to work around. With a simple request to Amazon, upper limits can be raised easily meaning that you are less restricted in the environments that you can construct.
The second limitation however proved over time to be much more challenging. AWS’ support for automation is great, however at the time of deploying our lab, support for applying DSC policies driven by AWS was lacking. As time went on however, support for this technology increased, so I wouldn’t consider this a limitation for any newly created environments targeting Windows.
With our cloud provider chosen, next we had to move onto actually creating some servers.
Terraform
Now in previous posts we have discussed the power of Terraform and just how easy this tool makes it to deploy infrastructure without resorting to manual configuration.
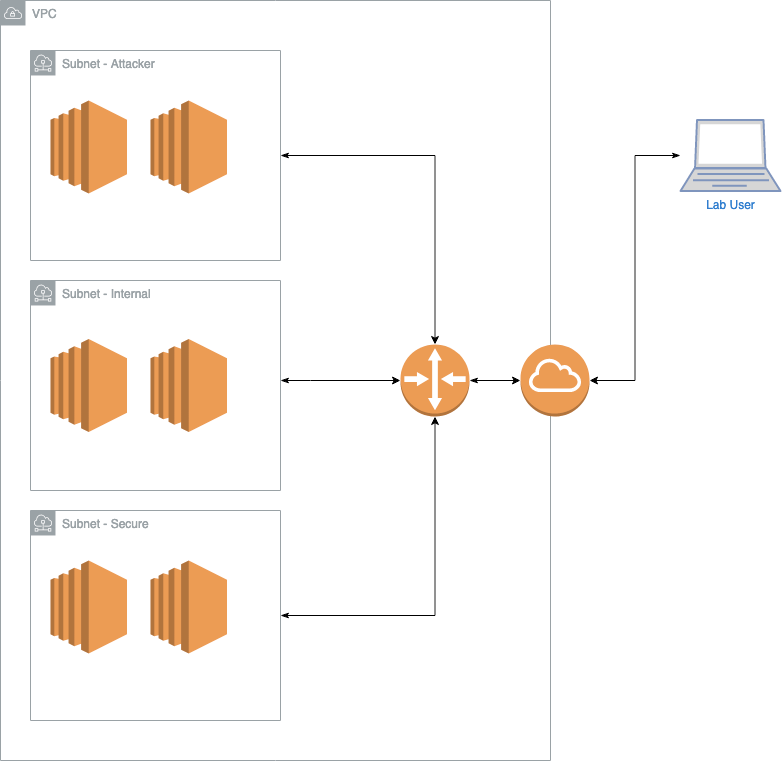
In our case we used Terraform as the basis of constructing all of our lab infrastructure in AWS. We use the AWS VPC as the container for each student, and define several subnets:
- Attacker Subnet – This network consists primarily of any machines directly accessed by trainees, for example, a Kali host exposed via Apache Guacamole and Windows development host providing RDP access for crafting and testing payloads. This subnet was considered our mock Internet.
- Internal Subnet – This subnet is used to represent the internal network of our fictitious victim, hosting a mix of servers, OSs and technologies all wrapped up in an Active Directory domain.
- Secure Subnet – A subnet which hosts a second domain for our fictitious victim, simulating a restricted environment housing sensitive services.
At a very high level, this gives us a layout that would look something like this:
Do It Yourself
Let’s kick things off by simplifying this concept for the purpose of creating a demo lab by creating a Terraform script which will provision a VPC along with 2 subnets and 2 servers.
We start our terraform script with our AWS configuration:
# Basic AWS configuration which will grab our keys from ENV
provider "aws" {
  region     = "eu-west-2"
  access_key = ""
  secret_key = ""
}

# Our AWS keypair
resource "aws_key_pair" "terraformkey" {
  key_name   = "${terraform.workspace}-terraform-lab"
  public_key = file(var.PATH_TO_PUBLIC_KEY)
}
Next up we define our VPC and subnets:
# Our VPC definition, using a default IP range of 10.0.0.0/16
resource "aws_vpc" "lab-vpc" {
  cidr_block           = var.VPC_CIDR
  enable_dns_support   = true
  enable_dns_hostnames = true
}

# Default route required for the VPC to push traffic via gateway
resource "aws_route" "first-internet-route" {
  route_table_id         = aws_vpc.lab-vpc.main_route_table_id
  destination_cidr_block = "0.0.0.0/0"
  gateway_id             = aws_internet_gateway.lab-vpc-gateway.id
}

# Gateway which allows outbound and inbound internet access to the VPC
resource "aws_internet_gateway" "lab-vpc-gateway" {
  vpc_id = aws_vpc.lab-vpc.id
}

# Create our first subnet (Defaults to 10.0.1.0/24)
resource "aws_subnet" "first-vpc-subnet" {
  vpc_id = aws_vpc.lab-vpc.id

  cidr_block        = var.FIRST_SUBNET_CIDR
  availability_zone = "eu-west-2a"

  tags = {
    Name = "First Subnet"
  }
}

# Create our second subnet (Defaults to 10.0.2.0/24)
resource "aws_subnet" "second-vpc-subnet" {
  vpc_id = aws_vpc.lab-vpc.id

  cidr_block        = var.SECOND_SUBNET_CIDR
  availability_zone = "eu-west-2a"

  tags = {
    Name = "Second Subnet"
  }
}

# Set DHCP options for delivering things like DNS servers
resource "aws_vpc_dhcp_options" "first-dhcp" {
  domain_name          = "first.local"
  domain_name_servers  = [var.FIRST_DC_IP, var.PUBLIC_DNS]
  ntp_servers          = [var.FIRST_DC_IP]
  netbios_name_servers = [var.FIRST_DC_IP]
  netbios_node_type    = 2

  tags = {
    Name = "First DHCP"
  }
}

# Associate our DHCP configuration with our VPC
resource "aws_vpc_dhcp_options_association" "first-dhcp-assoc" {
  vpc_id          = aws_vpc.lab-vpc.id
  dhcp_options_id = aws_vpc_dhcp_options.first-dhcp.id
}
With the VPC and subnets configured, we next create 2 hosts:
# Our first domain controller of the "first.local" domain
resource "aws_instance" "first-dc" {
  ami                         = data.aws_ami.latest-windows-server.image_id
  instance_type               = "t2.small"
  key_name                    = aws_key_pair.terraformkey.key_name
  associate_public_ip_address = true
  subnet_id                   = aws_subnet.first-vpc-subnet.id
  private_ip                  = var.FIRST_DC_IP

  tags = {
    Name = "${terraform.workspace}-First-DC"
  }

  vpc_security_group_ids = [
    aws_security_group.first-sg.id,
  ]
}

# Our second domain controller of the "second.local" domain
resource "aws_instance" "second-dc" {
  ami                         = data.aws_ami.latest-windows-server.image_id
  instance_type               = "t2.small"
  key_name                    = aws_key_pair.terraformkey.key_name
  associate_public_ip_address = true
  subnet_id                   = aws_subnet.second-vpc-subnet.id
  private_ip                  = var.SECOND_DC_IP

  tags = {
    Name = "${terraform.workspace}-Second-DC"
  }

  vpc_security_group_ids = [
    aws_security_group.second-sg.id,
  ]
}
You’ll notice that there are a lot of references to variables within these files. Over time this helps to keep your Terraform scripts clean without hardcoding values which are likely to change over time, separating your variables into another file such as:
variable "PATH_TO_PUBLIC_KEY" {
  default = "./keys/terraformkey.pub"
}

variable "VPC_CIDR" {
  default = "10.0.0.0/16"
}

variable "FIRST_SUBNET_CIDR" {
  default = "10.0.1.0/24"
}

variable "SECOND_SUBNET_CIDR" {
  default = "10.0.2.0/24"
}

variable "FIRST_DC_IP" {
  default = "10.0.1.100"
}

variable "SECOND_DC_IP" {
  default = "10.0.2.100"
}

variable "PUBLIC_DNS" {
  default = "1.1.1.1"
}

variable "MANAGEMENT_IP" {
  default = "3.1.3.3/32"
}
At this point we will pause the creation of our Terraform scripts to identify what else would be required to provision this environment. Take a deep breath, because next up is DSC.
Desired State Configuration
OK, so Desired State Configuration (DSC) sucks. As much as I’ve tried to like it over the long time I’ve been playing with it, it always finds a new and interesting ways to surprise me with just how terrible it can be. But it still remains one of the few viable options to provision a Windows OS in a similar way to our beloved Ansible on *nix systems.
One of the annoying elements to provisioning Windows systems are the many reboots required during installation and configuration, as well as the numerous dependencies between hosts and services, such as waiting for a domain controller to come online before a workstation can be configured to join that domain. DSC gives us the ability to handle these issues in a manageable way, by providing functionality to waiting for resources to come online and handle resuming of provisioning after a reboot is performed.
DSC can be applied via one of two modes, push or pull. In pull mode a pull server is required which unlike Azure was not supported via Amazon’s management tools at the time of creating our lab. So instead, provisioning is completed via pushing our DSC configuration to hosts.
Now DSC is really where your Windows based vulnerabilities are defined, from misconfiguring Active Directory to applying weak ACL’s to files and services. To give you an idea of just a few of the things we were able to introduce within DSC:
- Kerberos based vulnerabilities (Kerberoast, AS-REP roast, unconstrained delegation and constrained delegation based weaknesses etc)
- LAPS
- Active directory ACL/ACE based weaknesses
- Host based ACL/ACE based weaknesses
- GPO permission issues
- SQL server misconfiguration
- AppLocker deployment
- Microsoft Office configuration and automation
To purposefully misconfigure an environment using DSC is an experience, but surprisingly it holds up pretty well with the majority of tasks required to build our vulnerable networks.
Do It Yourself
Let’s continue our simple lab exercise by creating a DSC script to provision our hosts, starting with a Configuration block.
DSC includes a number of built-in resources, which provide functionality such as creating users, setting group members, creating files and directories etc. Support is also included for importing third-party resources exposing functionality such as managing Active Directory. For our sample lab we will leverage 2 DSC modules, ActiveDirectoryDsc and NetworkingDsc:
Configuration Lab {
    param
    (
        [Parameter(Mandatory)]
        [pscredential]$safemodeAdministratorCred,
        [Parameter(Mandatory)]
        [pscredential]$domainCred,
        [Parameter(Mandatory)]
        [string]$firstDomainName,
        [Parameter(Mandatory)]
        [string]$secondDomainName,
        [Parameter(Mandatory)]
        [pscredential]$firstDomainCred
    )

    Import-DscResource -ModuleName ActiveDirectoryDsc
    Import-DscResource -ModuleName NetworkingDsc

    # Resources will go here
}
Within our configuration we’re going to define 2 nodes which will act as domain controllers joined via a bi-directional trust. Let’s focus on our first node to show how our DC will be built:
...
    Node "First" {
        # Install ADDS role
        WindowsFeature ADDSInstall {
            Ensure = "Present"
            Name = "AD-Domain-Services"
        }

        # Optional GUI tools
        WindowsFeature ADDSTools {
            Ensure = "Present"
            Name = "RSAT-ADDS"
        }

        # Create our AdminUser account
        User AdminUser {
            Ensure = "Present"
            UserName = $domainCred.UserName
            Password = $domainCred
        }

        # Add our AdminUser to the local Administrators group
        Group Administrators {
            GroupName = "Administrators"
            MembersToInclude = $domainCred.UserName
            DependsOn = "[User]AdminUser"
        }

        # Promote our DC
        ADDomain CreateDC {
            DomainName = $firstDomainName
            Credential = $domainCred
            SafemodeAdministratorPassword = $safemodeAdministratorCred
            DatabasePath = 'C:\\NTDS'
            LogPath = 'C:\\NTDS'
            DependsOn = "[WindowsFeature]ADDSInstall"
        }

        # Wait for the DC role to come online before we continue provisioning
        WaitForADDomain waitFirstDomain {
            DomainName = $firstDomainName
            DependsOn = "[ADDomain]CreateDC"
        }
 ...
Now inevitably there will be things that you want to do which will not be provided via an existing DSC module. For these tasks DSC does allow us to execute arbitrary Powershell using the Script resource. Within this kind of resource we need to define 3 values:
- GetScript – Used to retrieve information on the state of the resource.
- TestScript – Used to check the current state of this resource. If this block returns $false, then SetScript is called.
- SetScript – Used to actually performs the provisioning step.
Let’s see an example of how we would create a Script resource to create a DNS conditional forwarded zone for use with adding our bidirectional trust between domains:
Script SetConditionalForwardedZone {
  GetScript = { return @{ } }

  TestScript = {
      $zone = Get-DnsServerZone -Name "second.local" -ErrorAction SilentlyContinue
      if ($zone -ne $null -and $zone.ZoneType -eq 'Forwarder') {
        return $true
      }

      return $false
  }

  SetScript = {
      $ForwardDomainName = "second.local"
      $IpAddresses = @("10.0.2.100")
      Add-DnsServerConditionalForwarderZone -Name "$ForwardDomainName" -ReplicationScope "Domain" -MasterServers $IpAddresses
  }

  DependsOn = "[WaitForADDomain]waitFirstDomain"
}
A complete example of our DSC files for the purposes of creating our simple lab can be found here.
Now DSC cannot be applied to a server in its current PowerShell form, it must first be compiled into a set of MOF files. To do this we import our DSC file and compile by invoking our Configuration block using something like:
$ConfigData = @{
    AllNodes = @(
        @{
            Nodename                    = "First"
            Role                        = "First DC"
            RetryCount                  = 1
            RetryIntervalSec            = 1
            PsDscAllowPlainTextPassword = $true
        },
        @{
            Nodename                    = "Second"
            Role                        = "Second DC"
            RetryCount                  = 1
            RetryIntervalSec            = 1
            PsDscAllowPlainTextPassword = $true
        }
    )
}

Lab -ConfigurationData $ConfigData `
    -firstDomainName "first.local" `
    -secondDomainName "second.local" `
    -domainCred (New-Object System.Management.Automation.PSCredential("admin", (ConvertTo-SecureString "DoesntMatter" -AsPlainText -Force))) `
    -safemodeAdministratorCred (New-Object System.Management.Automation.PSCredential("admin", (ConvertTo-SecureString "DoesntMatter" -AsPlainText -Force))) `
    -firstDomainCred (New-Object System.Management.Automation.PSCredential("first-admin", (ConvertTo-SecureString "DoesntMatter" -AsPlainText -Force)))
Once executed, we will see that a set of MOF’s will be created:
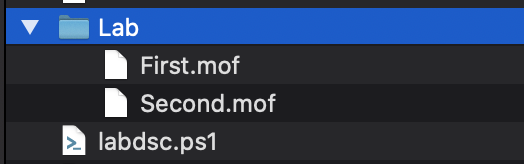
Now that our MOF’s are generated, we next need to apply them to our created EC2 instances.
Amazon Systems Manager
Amazon Systems Manager (originally named Simple Systems Manager or simply SSM) is a brilliant service provided by AWS to manage, provision and test resources such as EC2. If you want to apply Ansible roles or DSC configuration to your hosts, then Systems Manager can do that. If you want to test if your hosts are in compliance with a build policy, Systems Manager can help there to.
This service was selected early on in the development of our lab due to one nice feature of this technology, which is that each EC2 instance configured with a Systems Manager agent (installed by default on many of the Amazon AMI’s) makes an outbound connection to poll for jobs to complete. This means that we don’t have to open up remote management connectivity to all of the hosts in the lab just to apply a DSC policy and then retrospectively reconfigure everything once completed. We can instead allow each host to pull down its configuration and apply it as needed… pretty neat.
The other advantages of course is that we also get the stability of providing Systems Manager with our configuration specification and just allowing Amazon to “make it so”, rather than the alternative which would be for us to connect to each host and maintain a WinRM connection while provisioning takes place.
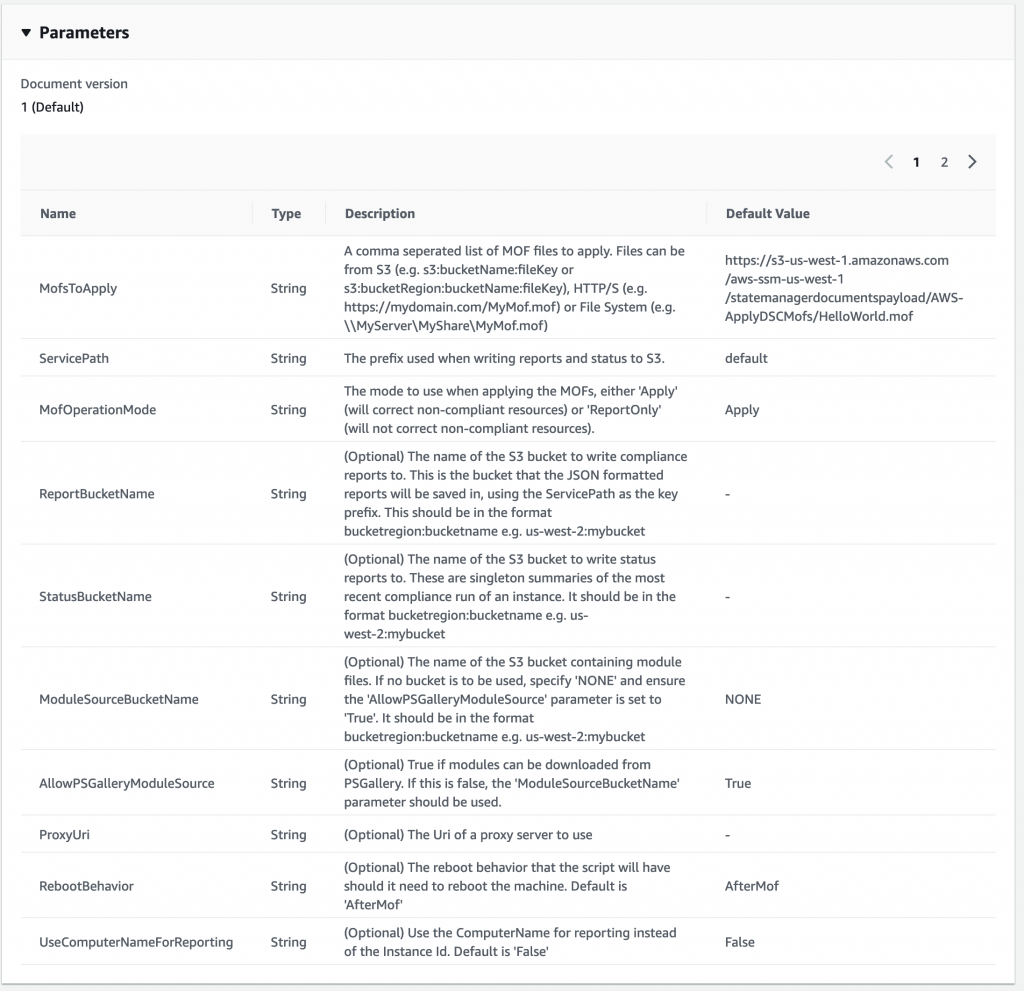
In the ActiveBreach lab, the command document that we use to provision our Windows hosts is AWS-ApplyDSCMofs:
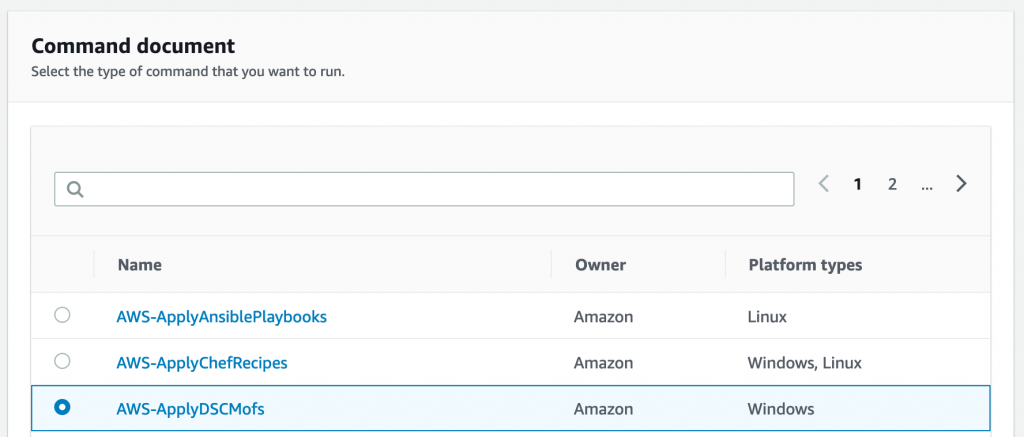
This document exposes several parameters which we use to control its execution, allowing us to throw MOF’s via an S3 bucket and allow System Manager to take care of connecting to our EC2 instances and actually applying them:
Do It Yourself
Now we understand just what Systems Manager is all about, let’s introduce this functionality into our own demo. First we will need to adapt our Terraform script to upload our newly generated DSC MOFs to an S3 bucket which will make them available to Systems Manager:
variable "SSM_S3_BUCKET" {
  default = "xpn-lab"
}

resource "aws_s3_bucket_object" "first-dc-mof" {
	bucket = var.SSM_S3_BUCKET
	key = "Lab/First.mof"
	source = "./Lab/First.mof"
	etag = "${filemd5("./Lab/First.mof")}"
}

resource "aws_s3_bucket_object" "second-dc-mof" {
	bucket = var.SSM_S3_BUCKET
	key = "Lab/Second.mof"
	source = "./Lab/Second.mof"
	etag = "${filemd5("./Lab/Second.mof")}"
}
Once we have our files uploaded, we will need to configure Systems Manager to associate each configuration with our EC2 instances. To do this in Terraform we use the aws_ssm_association resource:
resource "aws_ssm_association" "first-dc" {
  name             = "AWS-ApplyDSCMofs"
  association_name = "${terraform.workspace}-First-DC"

  targets {
    key    = "InstanceIds"
    values = ["${aws_instance.first-dc.id}"]
  }

  parameters = {
    MofsToApply    = "s3:${var.SSM_S3_BUCKET}:Lab/First.mof"
    RebootBehavior = "Immediately"
  }
}

resource "aws_ssm_association" "second-dc" {
  name             = "AWS-ApplyDSCMofs"
  association_name = "${terraform.workspace}-Second-DC"

  targets {
    key    = "InstanceIds"
    values = ["${aws_instance.second-dc.id}"]
  }

  parameters = {
    MofsToApply    = "s3:${var.SSM_S3_BUCKET}:Lab/Second.mof"
    RebootBehavior = "Immediately"
  }
}
Now Systems Manager requires that any credentials stored within the DSC MOF files are actually pulled from the parameter store as a way of avoiding hardcoding of credentials within files typically living in repos. For us we will need to add credentials to support our DSC using the aws_ssm_parameter resource:
resource "aws_ssm_parameter" "admin-ssm-parameter" {
  name  = "admin"
  type  = "SecureString"
  value = "{\\"Username\\":\\"admin\\", \\"Password\\":\\"Password@1\\"}"
}

resource "aws_ssm_parameter" "first-admin-ssm-parameter" {
  name  = "admin"
  type  = "SecureString"
  value = "{\\"Username\\":\\"first.local\\\\\\\\admin\\", \\"Password\\":\\"Password@1\\"}"
}
Before we can apply our DSC configuration, there is a bit more that we need to do. First up we need to ensure that our EC2 instances have appropriate permission to actually communicate with Amazon Systems Manager. This can be done via applying of an IAM role to deployed instances which is easily done via Terraform:
resource "aws_iam_role" "ssm_role" {
  name = "${terraform.workspace}_ssm_role"

  assume_role_policy = <<EOF
{
  "Version": "2012-10-17",
  "Statement": [
    {
      "Action": "sts:AssumeRole",
      "Principal": {
        "Service": "ec2.amazonaws.com"
      },
      "Effect": "Allow",
      "Sid": ""
    }
  ]
}
EOF
}

resource "aws_iam_role_policy_attachment" "ssm_role_policy" {
  role       = "${aws_iam_role.ssm_role.name}"
  policy_arn = "arn:aws:iam::aws:policy/service-role/AmazonEC2RoleforSSM"
}

resource "aws_iam_instance_profile" "ssm_instance_profile" {
  name = "${terraform.workspace}_ssm_instance_profile"
  role = "${aws_iam_role.ssm_role.name}"
}
It’s worth calling out a specific weakness here, AmazonEC2RoleforSSM provides the ability for any EC2 instance with this policy applied to communicate with the required services needed to use Amazon Systems Manager. It does however expose S3 permissions look like this:
{
	"Effect": "Allow",
	"Action": [
		"s3:GetBucketLocation",
		"s3:PutObject",
		"s3:GetObject",
		"s3:GetEncryptionConfiguration",
		"s3:AbortMultipartUpload",
		"s3:ListMultipartUploadParts",
		"s3:ListBucket",
		"s3:ListBucketMultipartUploads"
	],
	"Resource": "*"
}
This of course means that each EC2 instance would have access to all S3 buckets hosted on the AWS account, which if you plan on keeping this role applied to your EC2 instances outside of the initial provisioning stage, I’d certainly recommend reconsidering this.
For us this won’t prove to be too much of an issue as the role will be removed when we roll out our lab, so we’ll stick with Amazon’s default policy for now.
The final amendment required to our Terraform script will be to associate these policies with each AWS instance by adding the following to the 2 domain controller aws_instance resources:
iam_instance_profile = "${aws_iam_instance_profile.ssm_instance_profile.name}"
InSpec
As demonstrated in our previous post, testing of environments is important to us. And in an environment with so many moving parts, vulnerabilities, and purposeful misconfigurations, it becomes extremely important to ensure that everything is configured as expected. The last thing you want to happen is to find there is an issue with your environment the first day you deliver your training.
To perform our testing we rely on InSpec which helps to ensure that each instance is configured as expected:
We’ll come onto CI pipelines later in the post, but the benefit of this to us is the feedback we gain immediately during development if for some reason a late night change to DSC has broken something:
Do It Yourself
Now we have some provisioned servers to work with, let’s introduce some simple InSpec tests to ensure that our domain controllers have been deployed as expected. We’ll create our first test suite using:
inspec init profile first-dc
With our template structure created we now have to populate our test cases. For our simple lab we’ll just ensure that each feature is installed:
title 'Features'

describe windows_feature('AD-Domain-Services') do
    it { should be_installed }
end

describe windows_feature('RSAT-ADDS') do
    it { should be_installed }
end
And that our trust has been established:
title 'Trust'

describe command('Get-ADTrust -Identity "second.local"') do
    its('stdout') { should match (/second.local/) }
end
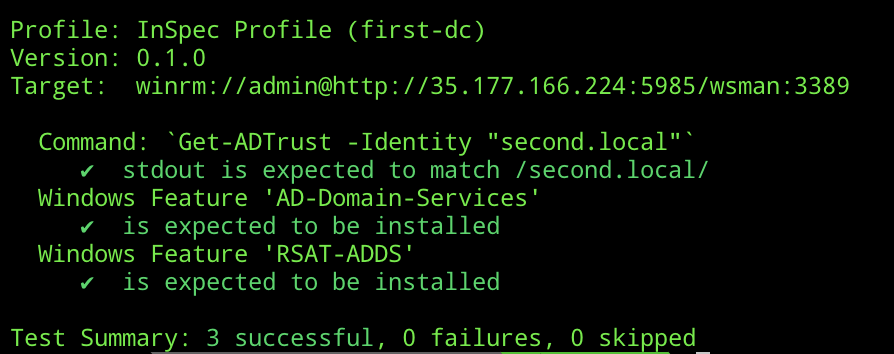
This means that once our lab has been built we can test using the following command:
inspec exec first-domaincontroller -b winrm --user FIRST\\admin --password Password@1 -t "winrm://IPADDRESS"
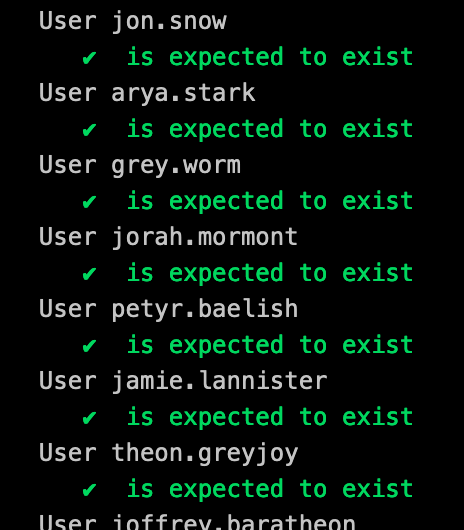
Hopefully if everything has provisioned correctly, you will see a wall of green confirming this:
More importantly, if everything hasn’t provisioned correctly (and believe me, this happens for some very random reasons), you will receive an early warning that everything is not as it should be.
Imaging
So by this point we have our deployed lab and we have our tests completing showing that everything is stable. The next step would be to scale this up for each attendee right? Well… no.
Something that you will quickly learn if you try to do this is just how error prone scaling in this way can be. We’ve seen random DSC failures, intermittent Windows problems, and in quite a few cases, EC2 instances getting stuck while first coming online. We’ve even seen the edge of the cloud, but that is a story for another day.
The other issue is of course the need to recreate environments for attendees should you need to. And DSC isn’t the quickest of technologies, meaning you don’t want your trainee waiting for half an hour for their environment to be recreated.
To work around these problems, we decided quite early on to build a single instance of the lab, test the environment to ensure that everything was created correctly, and then image each instance into an AMI. This means that during the creation of environments before a training class is given, we can quickly create environments as required for the number of attendees on our course. It also means that should an environment need to be reset, we can quickly destroy and recreate a host in isolation without having to deal with the re-provisioning process of an entire environment.
This imaging process in the ActiveBreach lab comes in 2 parts:
- Cleanup phase – During this stage we cleanup the images, removing anything left over from provisioning.
- AMI generation phase – Here we shut down each EC2 instance and generate a final AMI that will be used for deployment to our trainees.
For the cleanup phase, pywinrm is a brilliant library which allows us to execute Powershell remotely and comes in handy to remove any leftover files or bits of DSC that you’d rather cleanup.
For AMI generation, boto3 exposes AWS API’s such as the ability to create an image. Once the image is created it is tagged and ready to be deployed upon demand.
Do It Yourself
To create a set of AMIs for our lab instances, we will create a very simple Python script to leverage pywinrm and the boto3 library.
#!/usr/bin/python

import winrm
import boto3
import time

domain_user = "admin"
domain_pass = "Password@1"

class WinRMSession:
    def __init__(self, host, username, password, use_ntlm=False):
        self.host = host
        self.username = username
        self.password = password
        self.use_ntlm = use_ntlm

    def run_command(self, command, args=[]):
        if self.use_ntlm:
            s = winrm.Session(self.host, auth=(self.username, self.password), transport="ntlm")
        else:
            s = winrm.Session(self.host, auth=(self.username, self.password))

        try:
            r = s.run_cmd(command, args)

            print("=====[ STDERR ]=====")
            print(r.std_err.decode("ascii"))

            print("=====[ STDOUT ]=====")
            return r.std_out.decode("ascii")

        except InvalidCredentialsError as e:
            print("Error executing winrm commands")

def clean_windows_image(username, password, ip, domain_joined):

    print("====[ Cleaning {0} ]====".format(ip))

    dsc = "Write-Output '[DscLocalConfigurationManager()]' 'Configuration Meta { Node localhost { Settings { RefreshMode = \\'\\'Disabled\\'\\' } } }' > C:\\\\windows\\\\temp\\\\meta.ps1"

    s = WinRMSession(ip, username, password, use_ntlm=domain_joined)
    print(s.run_command('powershell', ['-c', 'Remove-DscConfigurationDocument -Stage Current -Force']))
    print(s.run_command('powershell', ['-c', 'Remove-DscConfigurationDocument -Stage Previous -Force']))
    print(s.run_command('powershell', ['-c', dsc]))
    print(s.run_command('powershell', ['-ep', 'bypass', '-c', 'cd C:\\\\windows\\\\temp; . .\\\\meta.ps1; Meta; Set-DscLocalConfigurationManager -Path .\\Meta']))

# First we need to clean up Windows resources
ec2 = boto3.resource('ec2')
response = ec2.instances.filter(Filters=[{'Name': 'tag:Workspace', 'Values': ['imager']},{'Name': 'instance-state-name', 'Values': ['running']}])

for instance in response:
    if instance.platform == "windows":
        clean_windows_image(domain_user, domain_pass, instance.public_ip_address, True)

# Now everything is cleaned up, we image
for instance in response:
    for kv in instance.tags:
            if kv["Key"] == "Name":
                print("====[ Creating AMI For {0}]====".format(kv["Value"]))
                name = kv["Value"] + "-{0}".format(time.time())
                instance.create_image(Name=name,Description="Lab Imager")
If we execute our script, what we find is that each EC2 instance containing the Workspace tag with a value of imager will be cleaned up, shut down and an AMI created:

Gitlab
Now as you’ve seen there are a lot of moving parts to this lab, and executing each alongside all of the changes that take place during development is just not sustainable.
I think it is known by now how much we enjoy CI/CD, so it comes as no surprise that our lab uses Gitlab CI to tie all the pieces together.
To take our lab from source to imaging, we use the following steps within our pipeline:
- Validate – Ensure our provided Terraform scripts are syntactically correct.
- Converge – Deploy our lab to an AWS staging environment.
- Test – Run InSpec tests to ensure that everything is built as expected.
- Image – Create AMI images for each host in the environment.
- Cleanup – Tear down the AWS staging environment.
Put together and our lab CI pipeline looks like this:

Do It Yourself
To take our lab to the deployment phase we will be creating a gitlab-ci.yml file. To start this off, we first need to choose our image:
image:
  name: hashicorp/terraform:light
  entrypoint:
    - '/usr/bin/env'
    - 'PATH=/usr/local/sbin:/usr/local/bin:/usr/sbin:/usr/bin:/sbin:/bin'
Next we’re going to define our AWS access keys:
variables:
  AWS_ACCESS_KEY_ID: $AWS_ACCESS_KEY
  AWS_SECRET_ACCESS_KEY: $AWS_SECRET_KEY
  AWS_DEFAULT_REGION: eu-west-2
As we won’t be creating our own Docker image for this lab, we will ensure that our required tools are present via:
before_script:
  - terraform --version
  - apk add --update python python-dev py-pip jq gcc g++ make
  - pip install awscli
Next we define the stages of our pipeline:
stages:
  - validate
  - converge
  - test
  - image
  - cleanup
Let’s go through each stage of our pipeline to see how all this fits together. The first step is validation which is a simple case of ensuring that our Terraform scripts are actually syntactically correct when new code is committed:
validate_terraform:
  stage: validate
  script:
    - terraform init && terraform validate
Once we know that our Terraform scripts are at least syntactically correct, we move onto the converge stage which is responsible for executing Terraform and providing AWS with our DSC scripts to execute. Now there are a few considerations that we need to make here. First is the fact that we need to save the output of our Terraform execution for a later stage, mainly so we can know what IP addresses were created. Second we need to transfer this information to a later stage (as well as make this information available for download if our build fails) of the pipeline which can be done via generating artifacts:
deploy:
  stage: converge
  when: manual
  script:
    - terraform init
    - terraform workspace new imager
    - terraform apply --auto-approve --var ENVIRONMENT=staging
    - terraform output --json > output.json
  artifacts:
    when: always
    paths:
      - $CI_PROJECT_DIR/terraform.tfstate.d
      - $CI_PROJECT_DIR/output.json
    expire_in: 1 week
With our environment created we next need to test our deployment with our created InSpec tests. To know which hosts to target we will invoke our InSpec tests via a very simple shell script which simply takes our previous output.json contents and parses it for the IP of the newly created host:
#!/bin/sh

USER='admin'
PASS='Password@1'

FIRST_DC_IP=$(cat ../output.json| jq -r '.["first-dc_ip"].value')
SECOND_DC_IP=$(cat ../output.json| jq -r '.["second-dc_ip"].value')

inspec exec first-dc -b winrm --user $USER --password $PASS -t "winrm://$FIRST_DC_IP"
inspec exec second-dc -b winrm --user $USER --password $PASS -t "winrm://$SECOND_DC_IP"
And then we call this script via our test stage:
inspec:
  before_script:
    - mkdir -p /etc/chef/accepted_licenses/
    - echo > /etc/chef/accepted_licenses/inspec
    - apk add ruby ruby-dev gcc g++ make jq ruby-bundler ruby-webrick ruby-etc python python-dev py-pip
    - gem install inspec inspec-bin bigdecimal
  stage: test
  when: manual
  allow_failure: true
  dependencies:
    - deploy
  script:
    - cd test && ./run.sh ../output.json
Once our tests check out, we need to move onto the imaging stage to generate our AMIs:
create_image:
  image: python:3
  stage: image
  when: manual
  before_script:
    - cd .
  script:
    - cd imager
    - pip install -r requirements.txt
    - python ./imager.py
And finally, we need to clean up our AWS environment to avoid any unnecessary costs:
cleanup:
  stage: cleanup
  when: manual
  script:
    - terraform workspace select imager
    - terraform destroy --auto-approve --var ENVIRONMENT=staging
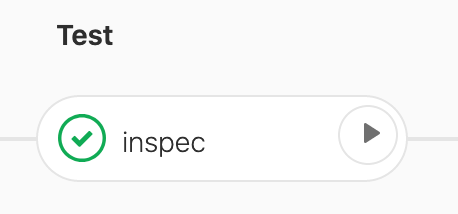
Once we commit this into our Gitlab instance, we will hopefully get a pipeline that looks like this:

Deploying
So at this point we have our environment which has been tested and converted to AMI images on AWS. All that remains now is to create our environment when running a training course.
To do this we again rely on Terraform, which is responsible for recreating our previous AWS structure, however instead of passing off to Amazon Systems Manager for DSC, this time we will simply build our EC2 images from the AMI, saving a lot of time and pain.
Now there are a number of blocks within our Terraform script that we don’t want to apply to our lab when it is deployed for a training class, mainly those permissions that System Manager grants to our S3 buckets.
To help manage multiple simultaneous deployments we use Terraform’s workspace functionality which creates isolated states to avoid trampling over each lab deployment. This means that each attendee is associated with a workspace, which gives us the ability to create, and more importantly when providing a lab environment, reset individual instances for trainees when required.
Do It Yourself
Let’s take our existing Terraform scripts and make a few modifications. First we want to substitute the stock Amazon AMI images with our custom created images. To do this we are going to add a range of data elements to our Terraform script which will search for our previously created AMI’s. For example, below we can see a data source which will attempt to find an AMI by name using the filter *-First-DC. If multiple AMIs are found, we tell the data source to always select the latest version:
data "aws_ami" "first-dc" {
  most_recent = true
  owners      = ["self"]
  filter {
    name   = "name"
    values = ["*-First-DC"]
  }
}
Next we’re going to add some Terraform hackery to get rid of those non-required SSM resources and S3 file uploads. We can do this by setting a Count property which evaluates to 0 when we don’t want a resource to be created. A simple way to do this is by evaluating a variable, for example:
count = var.ENVIRONMENT == "deploy" ? 0 : 1
And with our modifications made, we can deploy by toggling the deploy configuration using:
terraform workspace new lab01
terraform apply --var ENVIRONMENT=deploy
And once deployed, what we should find is that we now have our 2 EC2 instances:
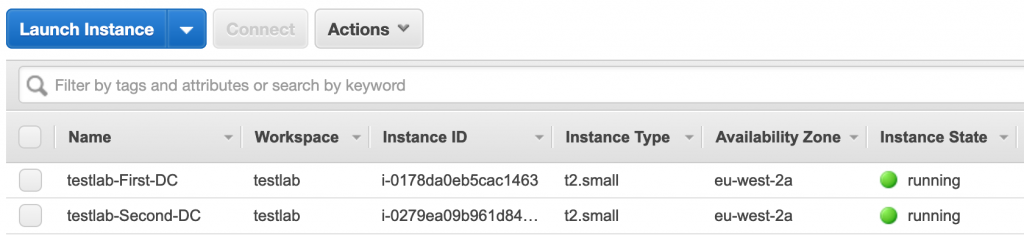
Running our provisioned and tested AMI:

With no IAM policy applied:

And a Windows domain built with an external trust:
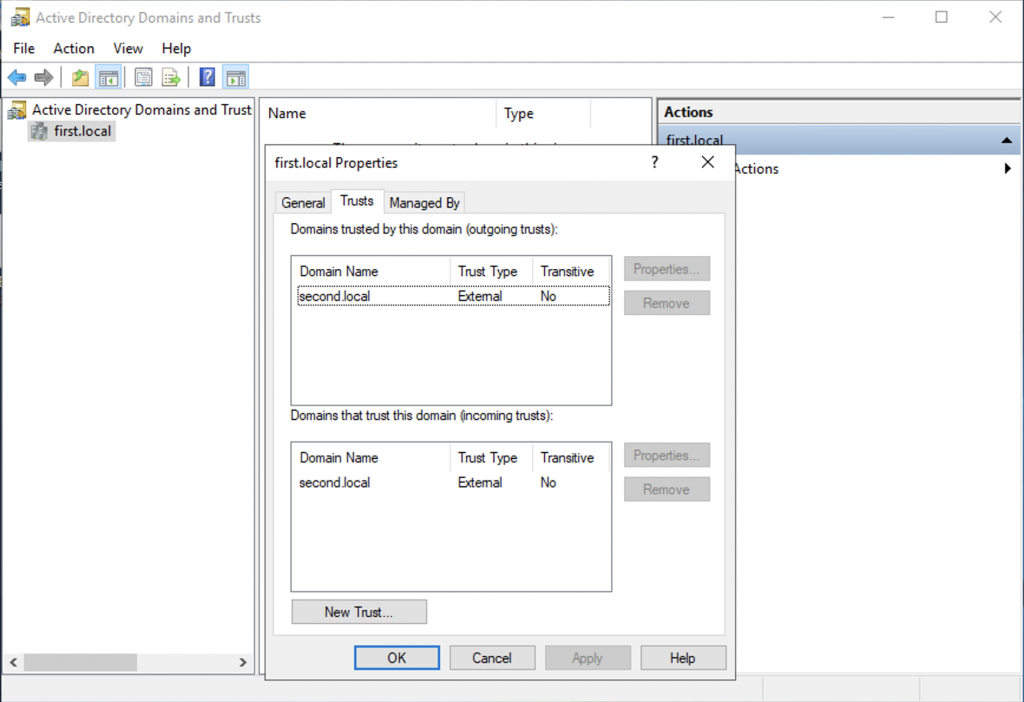
And there we have it, our lab is now automated, and can scale to any number of attendees required. All of the code shown in this post can be found on our Github project here. Hopefully this walkthrough has been useful and provides a working example of just how we go about delivering our training environments.
If you want to see this lab live, we still have spots available in our BlackHat USA training class.
This blog post was written by Adam Chester.